Wednesday, November 23, 2011

"Authenticated users" and the taxonomy hidden list

When provisioning a new SharePoint site, a few groups are automatically created for you. With most templates you automatically get a visitors, members and owners group. On publishing sites and record centers you get a lot more.

For a new Team Site, the "All Groups" page initially looks like this:


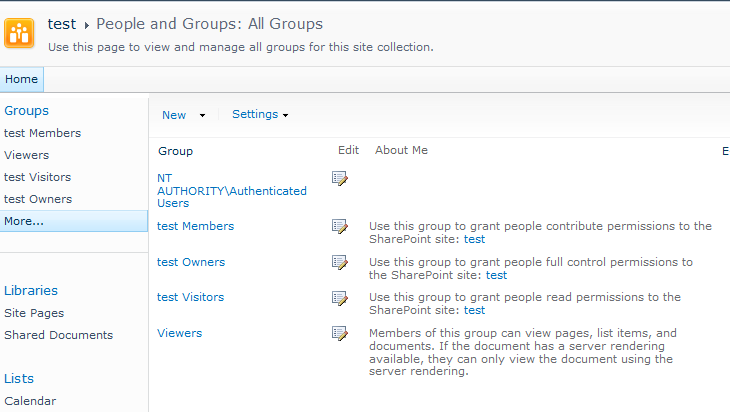
5 groups, most of them are pretty obvious. But what is this "Authenticated Users" group doing here? Basically, this is a group that is available through IIS and contains every user that can be authenticated by IIS, i.e., have their identity verified. For instance, all AD users automatically fall into this category.

From TechNet:
SID: S-1-5-11
Name: Authenticated Users
Description: A group that includes all users whose identities were authenticated when they logged on. Membership is controlled by the operating system.

If you want to know what permissions a group has within your site, SharePoint 2010 offers us the very useful "Check Permissions" option in the Site Permissions screen:


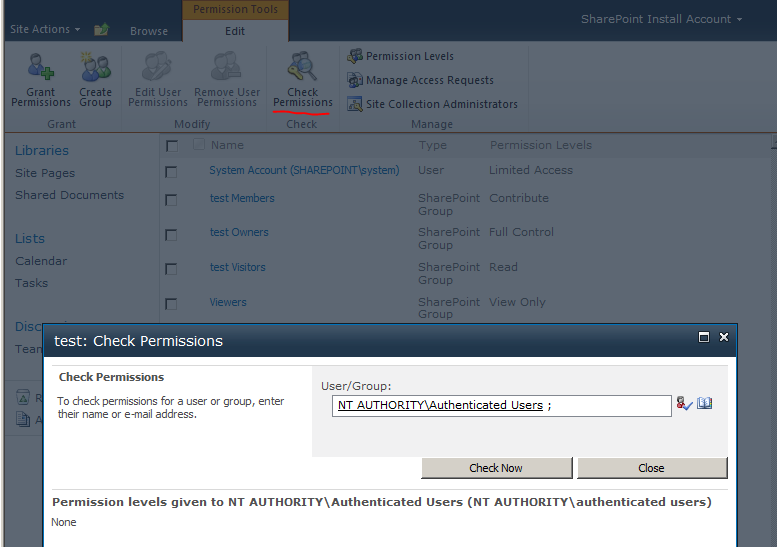
This shows us the Authenticated Users haven't got any permissions on our site.

So... an over-active user with spring cleaning in mind, could be forgiven for deleting this group from the site collection. This is pretty easy and you only get a very nondescript warning message:


However, the permission listing does not take permissions on hidden lists in account. Specifically the Taxonomy Hidden List (which is used for caching fields from the managed metadata service application), has some interesting permissions:


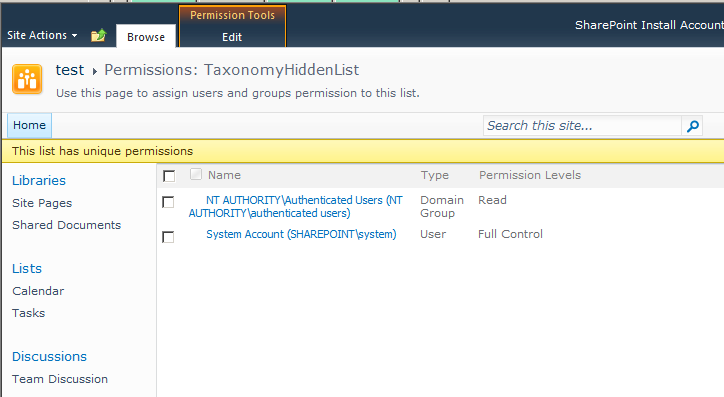
(Reach this list at [site]/lists/taxonomyhiddenlist)

Removing the Authenticated Users from your site will also remove their permissions from this list. It will cause strange behavior in your site. List views with managed metadata columns will suddenly have blank values. Edit and view forms for list items may show unauthorized exceptions. However, for site collection administrators everything will continue to work, so the problem may not be directly obvious. And when the action and the moment problems are reported lay further apart, trouble shooting becomes a challenge.


Bottom line: never remove the SharePoint groups that have been created for you by features or deployment

Further reading: A good post on the inner workings of the Taxonomy Hidden List


Update: The same problem can occur with the masterpage gallery. The publishing feature sets some limited reading rights on the gallery for all authenticated users. Removing these permissions will result in access denied on edit mode for pages for all users, including associated owners. Only site collection admins will still be able to edit pages.

Wednesday, August 3, 2011

Changing the order of fields in edit or display forms

Just a quick post in answer to a question I got yesterday:
How do you change the order of fields in edit or display forms?

It's a question a lot of end users struggle with, and I never know the answer without Google. So, I thought I'd put it up here, with some more relevant keywords, so others and I can find it more easily in the future.

1. Go to the list
2. Enter list settings (from the ribbon in 2010, from the drop downs in 2007)
3. Click Advanced settings
4. Ensure ‘allow management of content types’ is checked
5. Go back to the list settings
6. In the list of content types associated with the list, click the one you want to change the order of fields for (in lists that have been created ad hoc this is usually item or document).
7. In the bottom of the screen a link appears called ‘Column order’

Hope it helps someone.

Wednesday, March 30, 2011

Deploying solutions to a specific Web Application

SharePoint solutions (non-sandboxed) can be deployed at two scopes;
  • Globally
  • Web Application

SharePoint has the annoying habit of forcing you to deploy globally whenever possible. When you try to deploy a global solution to a specific url you get the following message:
- This solution contains no resources scoped for a Web application and cannot be deployed to a particular Web application.

In almost all cases I want to deploy my solution to a single web application. This makes creating reusable deployment scripts much easier. It also adds logic to your deployment scenario's and farm solution overview in Central Administration.

Update
Another important reason to deploy to a single web application is that upon deployment, retraction or updating of your solution you can avoid restarting all application pools. This limits downtime, especially when you are not alone in your farm:
Avoid creating a lot of global SharePoint Packages and try instead to provision as much as you can to specific Web Applications. Every time you touch a global SharePoint Package all Applications Pools will be stopped/recycled. Although there are some scenarios when you can’t avoid creating global SharePoint Packages, you should try to avoid them
An interesting post by Waldek on the subject.
/Update

The trick is fooling SharePoint into registering your solution as a web application scoped solution. SharePoint checks wether there are items which have to be deployed to a specific web application when your solution is added to the solution gallery. One of the elements that SharePoint checks for are safe control entries. These have to be merged into a web.config for a specific web application. The easiest way to force deployment to a specific web application is adding a dummy safe control entry to your package.

Here is how you do that:


1. Double click the package
2. Open the manifest
3. Edit the options
4. Add you dummy data. In my solution I added the following:

<Solution xmlns="http://schemas.microsoft.com/sharepoint/"> 
 <Assemblies>   
  <Assembly Location="SharePointProject1.dll" DeploymentTarget="GlobalAssemblyCache">     
   <SafeControls>       
   <SafeControl Assembly="SharePointProject1,Version=1.0.0.0, Culture=neutral, PublicKeyToken=****************" Namespace="SharePointProject1" TypeName="*" />     
   </SafeControls>   
  </Assembly> 
 </Assemblies>
</Solution>

That's all there is to it. This solution will now only deploy at the web application scope!


Note: For MOSS this works the same. How to add the entry is a bit different depending on your wsp packaging tool. With STSDEV you can add the entry to the SolutionConfig.xml.

Wednesday, March 9, 2011

Exceptions when creating site columns based on local term sets

This blog is about a little known bug in SharePoint 2010. The bug manifests as follows:

When creating a new site column of the managed meta data type, and you select "customize your term set", you are presented with one of the following errors:
- This operation cannot be completed. The term store may be unavailable.
- Failed to read from or write to database. Refresh and try again. If the problem persists, please contact the administrator


Reason

When you create a site column, the first field is the title. This field is required, but you can start filling out the rest of the form before entering the title. When you choose "Managed Meta data", and then "Customize your term set", an empty term set is directly created for you. This term set is titled "Untitled". This term set is stored in the managed meta data service. Even when you rename the term set afterward, and give the site column a proper name, a reference to this "Untitled" site column is kept, linked to the url of your site collection. You can see this when you create a new column, and again don't specify a title. The suggested title for your term set will be "Untitled_1".

As long as you keep your site collection, this is not a problem. However, when you delete this site collection and create a new site collection at the same url, this reference causes problems. Because it was stored in the service application, it was not deleted.

It is always in the way when you try to create new site columns with customized term sets.


Solution

The only solution I found is creating a new Managed Meta data Service instance. You might want to delete the old one, with the corrupt data, but based on business needs this may not be an option. Remember to configure the new Managed Meta data Service instance with "This service application is the default storage location for column specific term sets" set to true:


If you don't, you'll get the following error:
"The default term store for this site cannot be identified"

Update: The first service pack for SharePoint contains a fix for the following problem:
- If a user creates a site collection, deletes it, and then re-creates the site collection by using the same name, the site collection group is not re-created in the term store.
If I'm not mistaken, this is a fix for the bug described here.

Monday, February 21, 2011

Usefull forms in the Layouts directory

It's been a while since I last posted here. Almost 2,5 years have passed since my last post. I've still been doing SharePoint, I just never got around to blogging about it. I'll try to post more in the coming months, so check back for updates.


To kick things of, I have a little tip that can be very useful to site administrators. SharePoint has a lot of forms for managing the site. These are located in the 14 hive's layouts directory (C:\Program Files\Common Files\Microsoft Shared\Web Server Extensions\14\TEMPLATE\LAYOUTS).

Some of these are available through the site settings menu. Others are only seen when SharePoint redirects you to them. Most of these however, are also available by just browsing to them. I'll discuss 2 examples, but many more usefull forms are available.

WARNING
The forms mentioned in this page are hidden for a reason. Some of these may not work in all circumstances. Others, such as the 'Save site as template' let you perform actions that are not officially supported. Always use common sense when using these things and try the effects in a development or testing environment if at all possible.
/WARNING


In site without publishing features you cannot change the masterpage. As you can see here, there is no 'Masterpage' link:


Most of us SharePoint-devers are pretty codeminded, and will choose to just change the masterpage through code, or in our site/web template. However the form is still available:


All you need to do is browse to the /_layouts/ChangeMasterPage.aspx page.


A second example is the PermSetup.aspx page. This is the page you get when you choose to use unique permissions for your site. It allows you to manually set the associated member and owner groups for your site. This screen is quite important, because it is the only chance you have for setting the association through the UI. However, the only time you get there is at site creation. Unless you just browse to the /_layouts/PermSetup.aspx page:


Hope these two will save you the trouble of writing custom code.

Small update, the link to save your site as a template isn't shown when publishing is enabled. This doesn't mean it's gone:
/_layouts/savetmpl.aspx

Rating